
Status: AVAILABLE
Start a new project with ⌘N, through File › New Project … or using the icon in the top bar. The setup assistant opens.
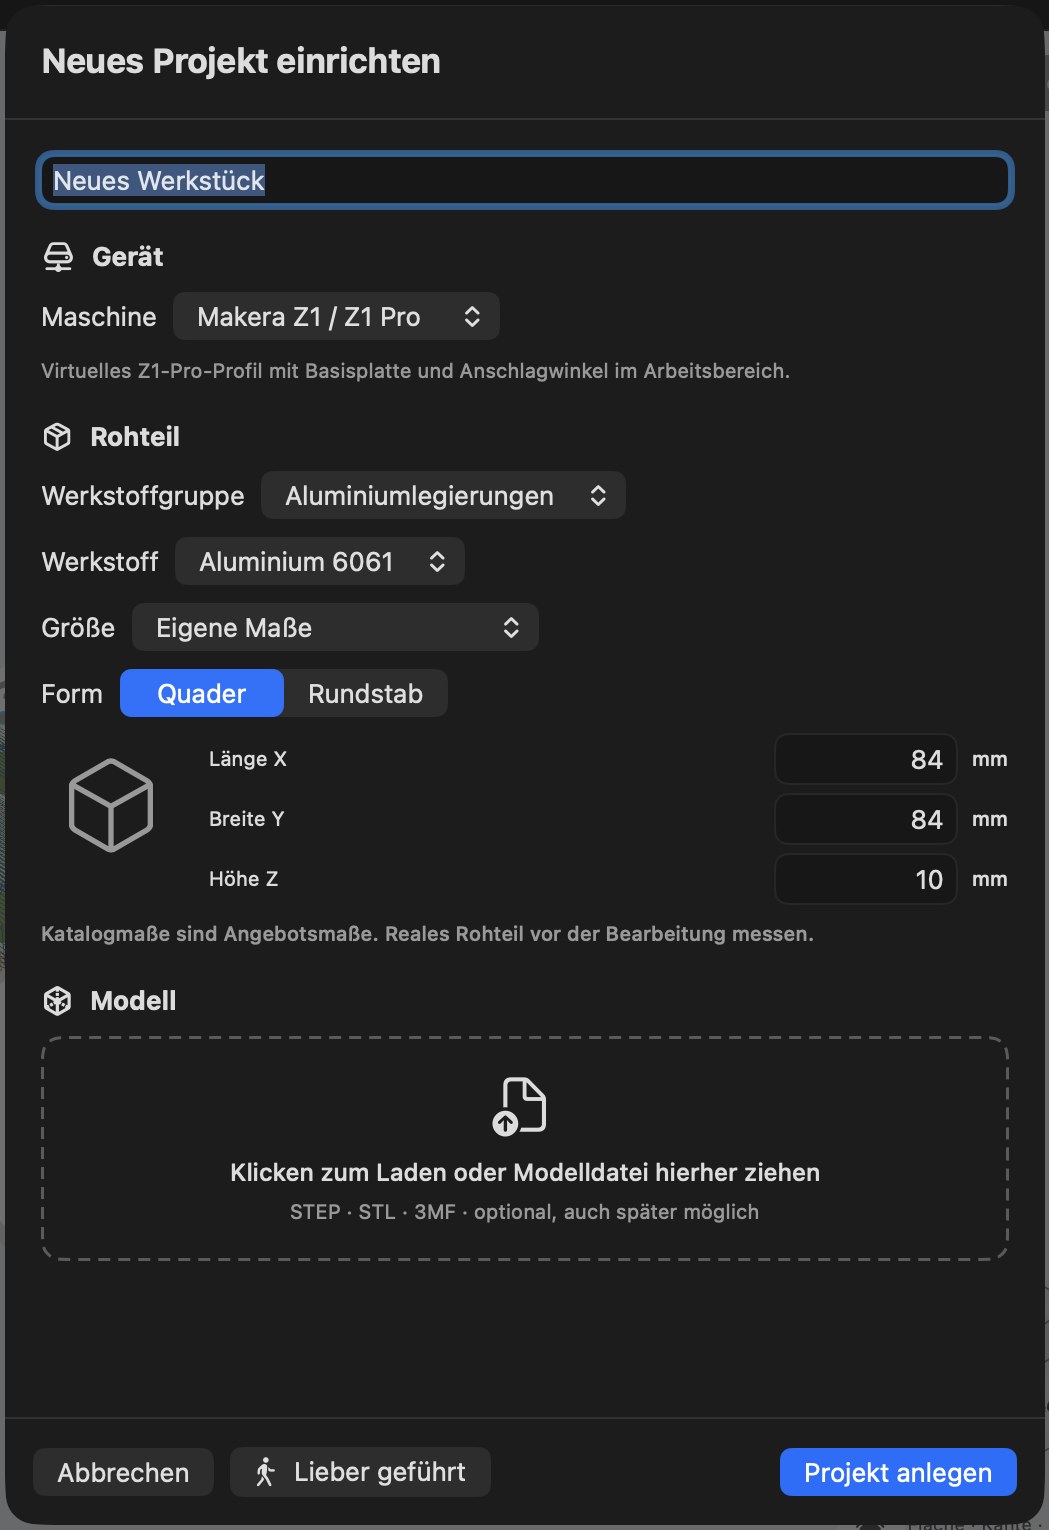
Enter a project name at the top (default: “New workpiece”).
Step 1: Choose a device
Under Machine, choose your mill: Makera Z1 / Z1 Pro, Makera Carvera, Makera Carvera Air or a custom machine from your library. The profile defines the working envelope and spindle-speed and feed limits. For the Makera Z1, the base plate with its corner stop and holes appears in the workspace.
Step 2: Define the stock
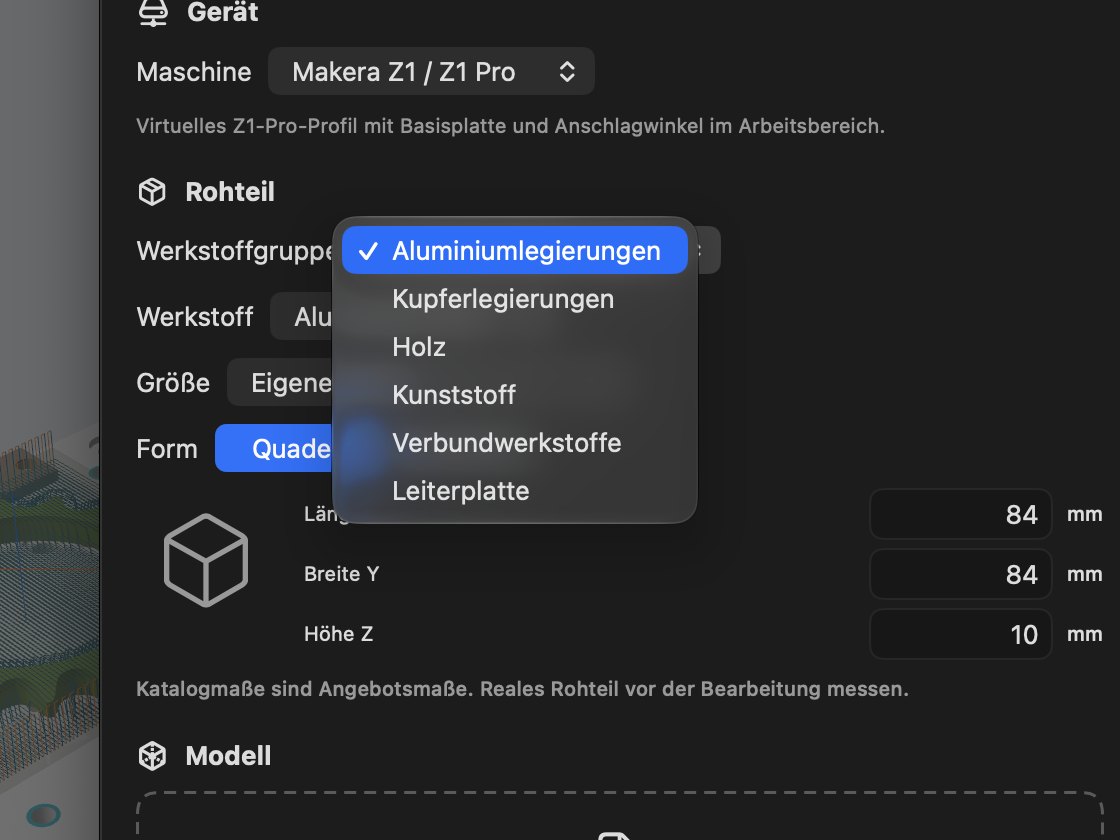
- Choose the material group: aluminium, copper alloys, wood, plastic, composites or circuit board.
- Choose the material, e.g. aluminium 6061, aluminium 7075, brass, copper, POM (Delrin), acrylic (PMMA), carbon fibre (CFRP).
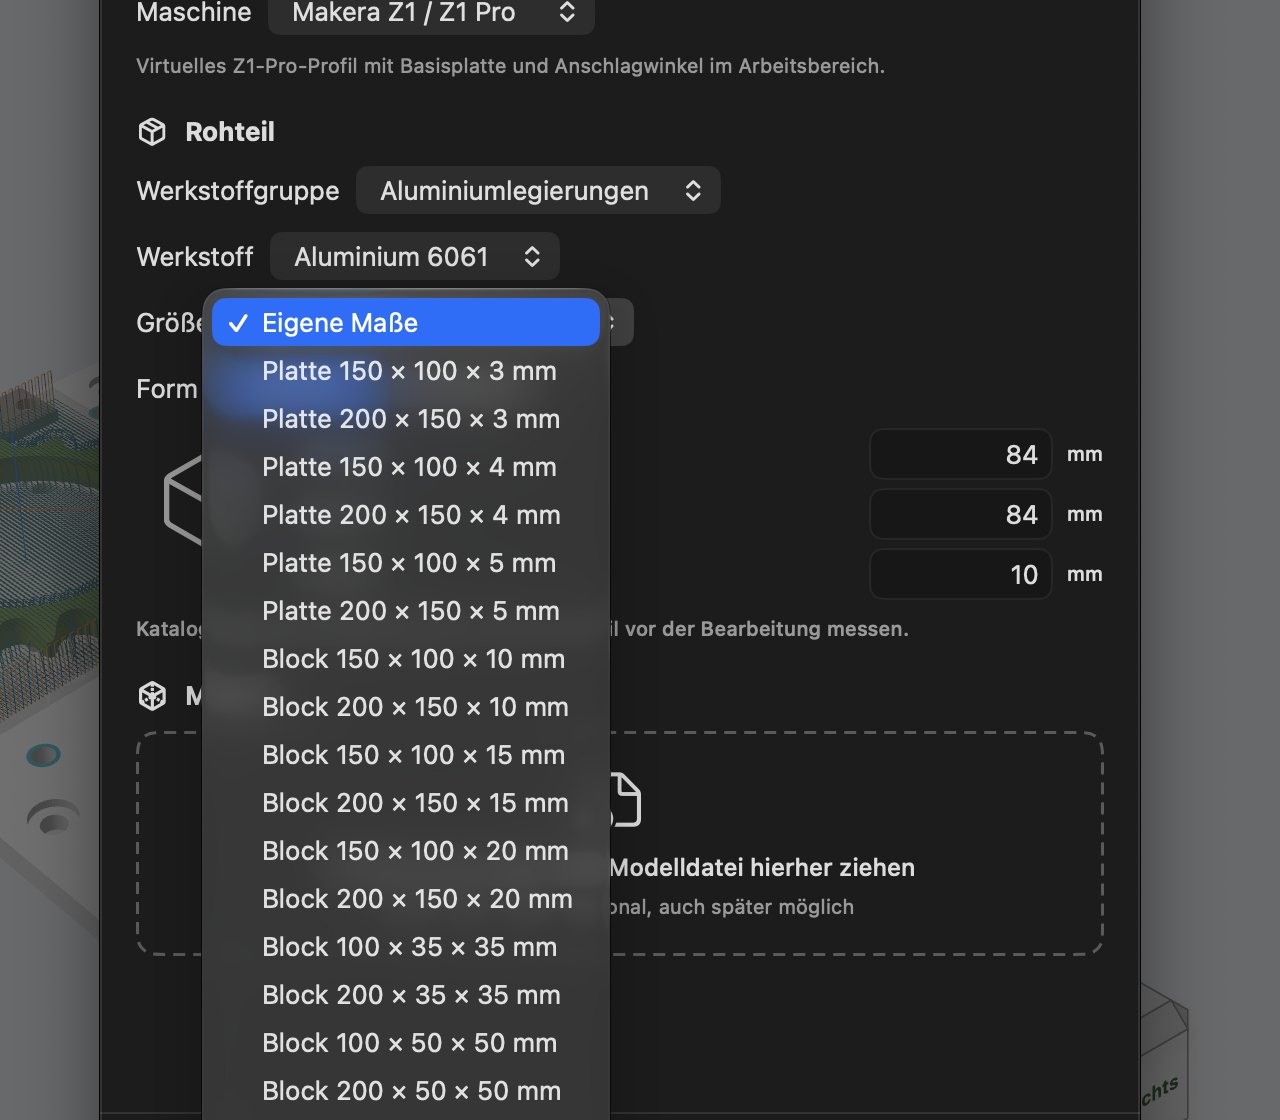
- Choose a size from the catalog (189 templates for sheets, blocks and round bars, e.g. “Sheet 200 × 150 × 5 mm” or “Block 100 × 50 × 50 mm”) or Custom dimensions with length X, width Y and height Z.
- Shape: block or round bar.
Tip: Always measure your stock with calipers. The app points out: “Catalog dimensions are nominal supplier dimensions. Measure the real stock before machining.” The catalog contains no size templates for wood — enter your own dimensions for it.
Custom materials: You can create your own material names through the material menu. The application recognizes duplicates and typing errors (“Did you mean brass?”). With an active connection, materials can be taken from MakeOrbit. There are no catalog cutting parameters for custom materials.
Step 3: Load a model
Click the field or drag a STEP, STL or 3MF file into it. This is optional; you can also load the model later.
Prefer guided? This button starts Guided Mode instead of a normal project.
Create Project opens the project directly in CAM view. You can return to the assistant at any time using the pencil in the setup card.